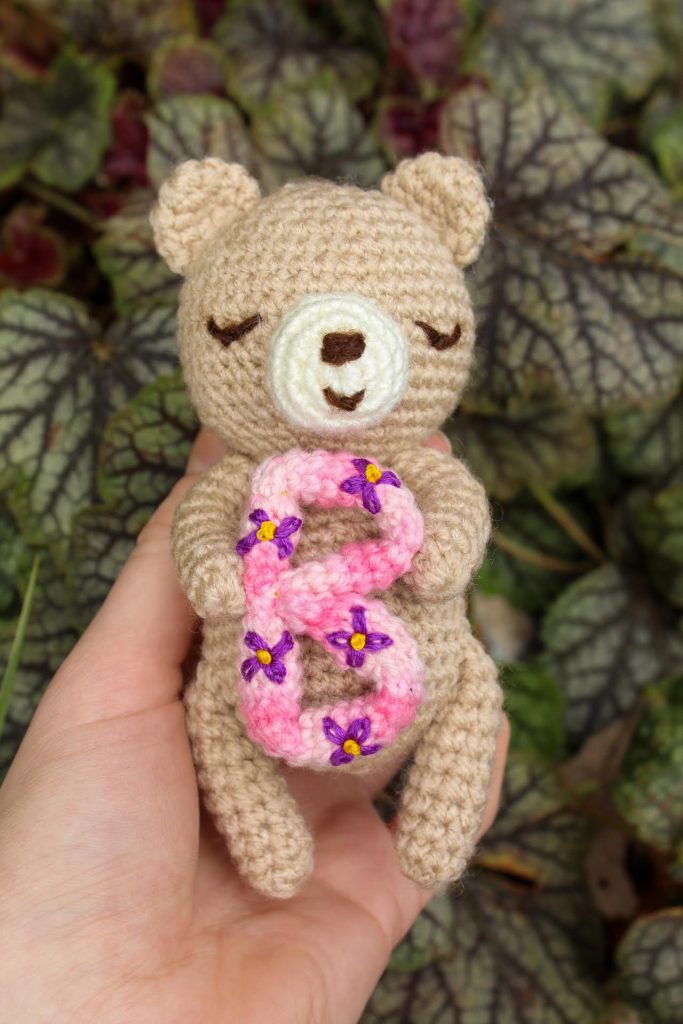
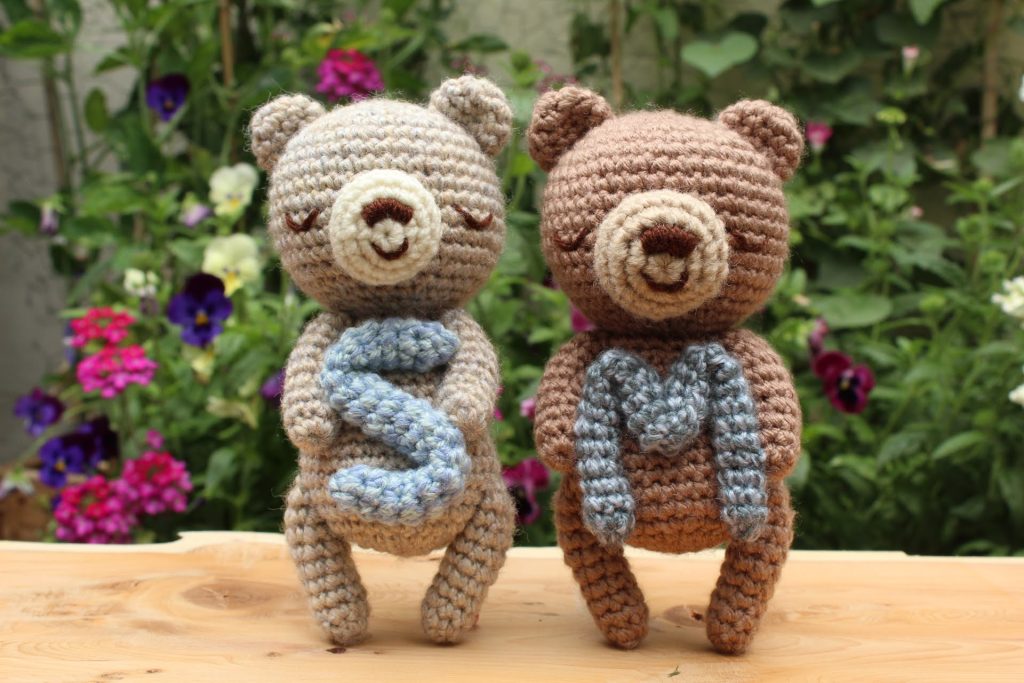
These adorable bears are perfect for gifting to anyone special. Whether you’re looking to change colours and add personalised touches, our patterns allow you to unleash your creativity and make each bear truly one-of-a-kind. Additionally, you have the flexibility to adjust the size by using different thicknesses of yarn. Below are some of the examples of the bears that I have made.
Pattern Skill: Easy
Hook size: 3.0 mm
Yarn weight: DK
Materials:
3.0 mm hook
Main colour yarn
Contrast colour yarn
Embroidery thread
Yarn needle
Scissors
Toy Stuffing
Stitches and Abbreviations:
st(s) = stitch(s)
ch = chain
MR = magic ring
sc = single crochet
inc = single crochet increase
dec = single crochet decrease
rep = repeat
rnd(s) = round(s) / row(s)
Head:
Using your main colour
1. 6sc in MR (6sts)
2. inc x 6 (12sts)
3. (1sc, inc) x 6 (18sts)
4. 1sc, (inc, 2sc) x 5, inc, 1sc (24sts)
5. (3sc, inc) x 6 (30sts)
6. 2sc, (inc, 4sc) x 5, inc, 2sc (36sts)
7. (5sc, inc) x 6 (42sts)
8 – 14. 1sc in each st (42sts) – 7 rnds
15. (5sc, dec) x 6 (36sts)
16. 2sc, (dec, 4sc) x 5, dec, 2sc (30sts)
17. (3sc, dec) x 6 (24sts)
18. 1sc, (dec, 2sc) x 5, dec, 1sc (18sts)
Fasten off with a short tail end. Stuff the head with toy stuffing and weave the tail end into the head.
Arms & Legs: x 2
Using your main colour
1. 8sc in MR (8sts)
2 – 10. 1sc in each st (8sts) – 9 rnds
Fasten off with a tail end. Stuff the arms and legs but leaving a little space at the top so that you can flatten them.
Body:
Using your main colour
1. 6sc in MR (6sts)
2. inc x 6 (12sts)
3. (1sc, inc) x 6 (18sts)
4. 1sc, (inc, 2sc) x 5, inc, 1sc (24sts)
5. (3sc, inc) x 6 (30sts)
6. 2sc, (inc, 4sc) x 5, inc, 2sc (36sts)
7. 1sc in each st (36sts)
8. 7sc,
*Flatten a leg so that the tail end is in the middle of the flattened edge. Hold the leg against the body with the tail end on the inside – between the leg and the body.
4sc through both the leg and the body*, 14 sc, rep from * to * once more, 7sc (36sts)
9 – 10. 1sc in each st (36sts) – 2 rnds
11. 2sc, (dec, 4sc) x 5, dec, 2sc (30sts)
12 – 13. 1sc in each st (30sts) – 2 rnds
14. (3sc, dec) x 6 (24sts)
15. 1sc in each st (24sts)
16. 1sc, (dec, 2sc) x 5, dec, 1sc (18sts)
17. 1sc in each st (18sts)
Fasten off with a long tail end; this will be used to sew the head onto the body later. Stuff the body. Using the tail ends of the legs, secure the legs to the body so that the legs are flattened at a slight angle inwards.
Tail:
Using your main colour
1. 6sc in MR (6sts)
2. inc x 6 (12sts)
3. 1sc in each st (12sts)
4. dec x 6 (6sts)
Fasten off with long tail end. Stuff the tail.
Ears: x2
Using your main colour
1. 6sc in MR (6sts)
2. inc x 6 (12sts)
3 – 4. 1sc in each st (12sts) – 2 rnds
Fasten off and leave a long tail end. Flatten the ears with the tail end in the corner and whip stitch across the edge. you should have enough of a tail end to sew the ears onto the head later.
Snout:
Using your contrast colour
1. 6sc in MR (6sts)
2. inc x 6 (12sts)
3. (1sc, inc) x 6 (18sts)
4 -5. 1sc in each st (18sts) – 2 rnds
Assembly:
Sew the head onto the body using the tail end of the body. Sew one stitch on the head to one stitch on the body. Hide the tail end inside the body. Next arrange the arms parallel to the legs and sew the top of them to seam between the head and the body. Sew the ears perpendicular to the arms and legs on top of the head make sure that they are evenly spaced on either side of the centre of the head. The tail should be places between and level with the top of the legs on the back of the bear. Place the snout between rnd 8 and 9 from the top of the head.